สารจากผู้เขียน
สวัสดีครับเพื่อน ๆ ทุกคนพบกันแล้วนะสำหรับบทความที่แล้วที่สอนไปหลายคนคงสงสัยทำไมปุ่มไม่สามารถทำงานได้ในวันนี้บทความซีรีย์พาทำ Mobile Application ด้วย React Native จะพาทุก ๆ ไปทำแอปกันต่อในส่วนของการเพิ่มปุ่มไปในโปรเจกต์กันครับ

สวัสดีครับเพื่อน ๆ ทุกคนพบกันแล้วนะสำหรับบทความที่แล้วที่สอนไปหลายคนคงสงสัยทำไมปุ่มไม่สามารถทำงานได้ในวันนี้บทความซีรีย์พาทำ Mobile Application ด้วย React Native จะพาทุก ๆ ไปทำแอปกันต่อในส่วนของการเพิ่มปุ่มไปในโปรเจกต์กันครับ
 เขียนโดย
Chairawit Iamkhajornchai
Internship @ borntoDev
บทความนี้ตีพิมพ์ และ เผยแพร่เมื่อ 12 กรกฎาคม 2566
สำหรับปุ่มหรือ Button ใน React Native เราสามารถสร้างเป็น Component กำหนด Style และ Behavior ไว้ได้เลย โดยจากตัวอย่างในเราจะมี Button Component ที่มี prop เป็น title และ onPress
import { Button, View } from 'react-native';

const MyButton = () => {
  const handlePress = () => {
    // โปรแกรมทำงานอะไรต่อเมื่อมีการกดปุ่มนี้
  };

  return (
    <View>
       <Button title="Press me" onPress={handlePress} />
    </View>
  );
};
แล้วหลังจากนั้นก็ไปทำการสร้าง Component สำหรับกด ๆ จิ้ม ๆ ที่เรียกว่า Touchable Component โดยมี Component นั่นคือ TouchableOpacity และ TouchableHighlight
import { TouchableOpacity, Text, View } from 'react-native';

const MyButton = () => {
  const handlePress = () => {
    // Action to be performed when the button is pressed
  };

  return (
    <View>
       <TouchableOpacity onPress={handlePress}>
         <Text>Press me</Text>
       </TouchableOpacity>
    </View>
  );
};
และนี่คือวิธีพื้นฐานในการสร้างปุ่มใน React Native มันง่ายมากใช่มั้ยครับ เดี๋ยวเราจะเอาไปประยุกต์ต่อกับโปรเจกต์ของเราจากบทความก่อนหน้านี้กันครับ โดยสามารถลองทำตามบทความก่อนหน้าที่ได้ลิงก์นี้ครับ https://www.borntodev.com/2023/07/10/การทำ-circle-timer-ด้วย-react-native/
1. เริ่มจากย้อนกลับไปดู Timer.js ในบทความก่อนหน้านี้กันก่อนนะครับ ที่เราได้มีการ import ส่วนที่ต้องการใช้งานดังนี้ เริ่มจาก Import React เรียกใช้ useState , useEffect เหมือนเช่นเดิม และ component ต่าง ๆ
import React, { useState, useEffect } from 'react';
import { View, StyleSheet, Text, TouchableOpacity } from 'react-native';
2. เริ่มทำระบบของเวลานับถอยหลังโดยเราจะประกาศ isRunning และ setIsRunning เข้ามาเพื่อเป็นตัวตรวจจับการเริ่มหรือหยุดและรีเซ็ตการเดินของนาฬิกา มีการแสดงผลของรูปแบบเวลาด้วย formatTime ต่อด้วยส่วนของ Styles ที่มีการเพิ่มเติมขึ้นมา
const Timer = () => {
const [isRunning, setIsRunning] = useState(false);
const [seconds, setSeconds] = useState(25 * 60);
useEffect(() => {
let interval = null;
if (isRunning) {
interval = setInterval(() => {
setSeconds((prevSeconds) => prevSeconds - 1);
}, 1000);
} else {
clearInterval(interval);
}
return () => clearInterval(interval);
}, [isRunning]);
const formatTime = (time) => {
const minutes = Math.floor(time / 60);
const seconds = time % 60;
return `${minutes}:${seconds.toString().padStart(2, '0')}`;
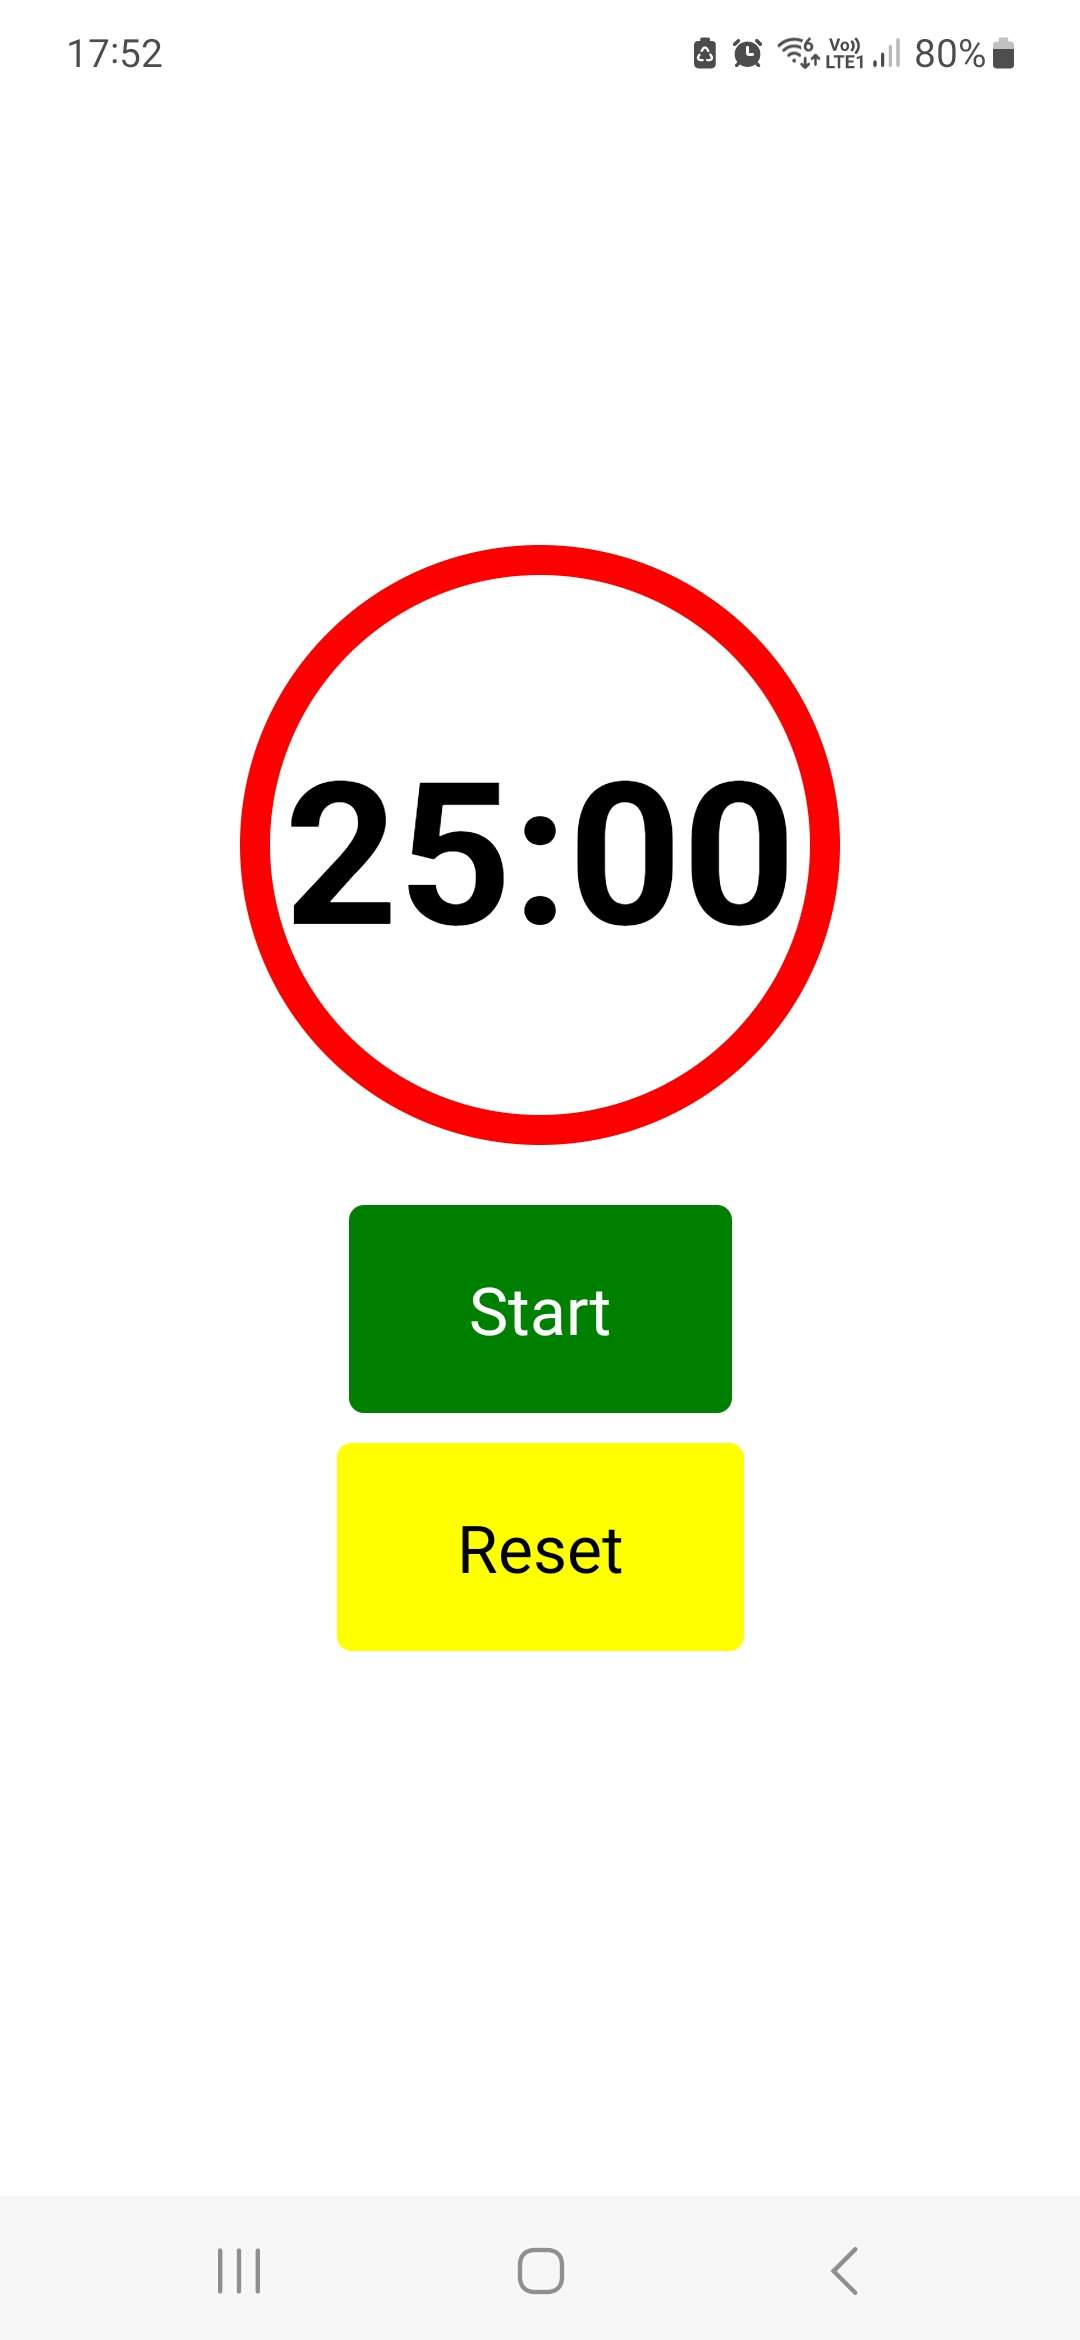
};3. มีการสร้าง Button เริ่มต้นขึ้นมาคือ StartButtonText ที่ตั้งขนาดและสีเอาไว้และสร้างสีปุ่มแยกของ Start และ Stop ตามด้วย Reset ด้วย โดยส่วนของการแสดงผลส่วนสุดท้ายจะมีการ Return
buttonContainer: {
justifyContent: 'center',
alignItems: 'center',
},
startButton: {
paddingVertical: 20,
paddingHorizontal: 40,
borderRadius: 5,
marginBottom: 10,
},
startButtonText: {
fontSize: 20,
textAlign: 'center',
color: 'white',
},
startButtonGreen: {
backgroundColor: 'green',
},
stopButtonRed: {
backgroundColor: 'red',
},
resetButton: {
backgroundColor: 'yellow',
paddingVertical: 20,
paddingHorizontal: 40,
borderRadius: 5,
},
resetButtonText: {
fontSize: 20,
textAlign: 'center',
color: 'black',
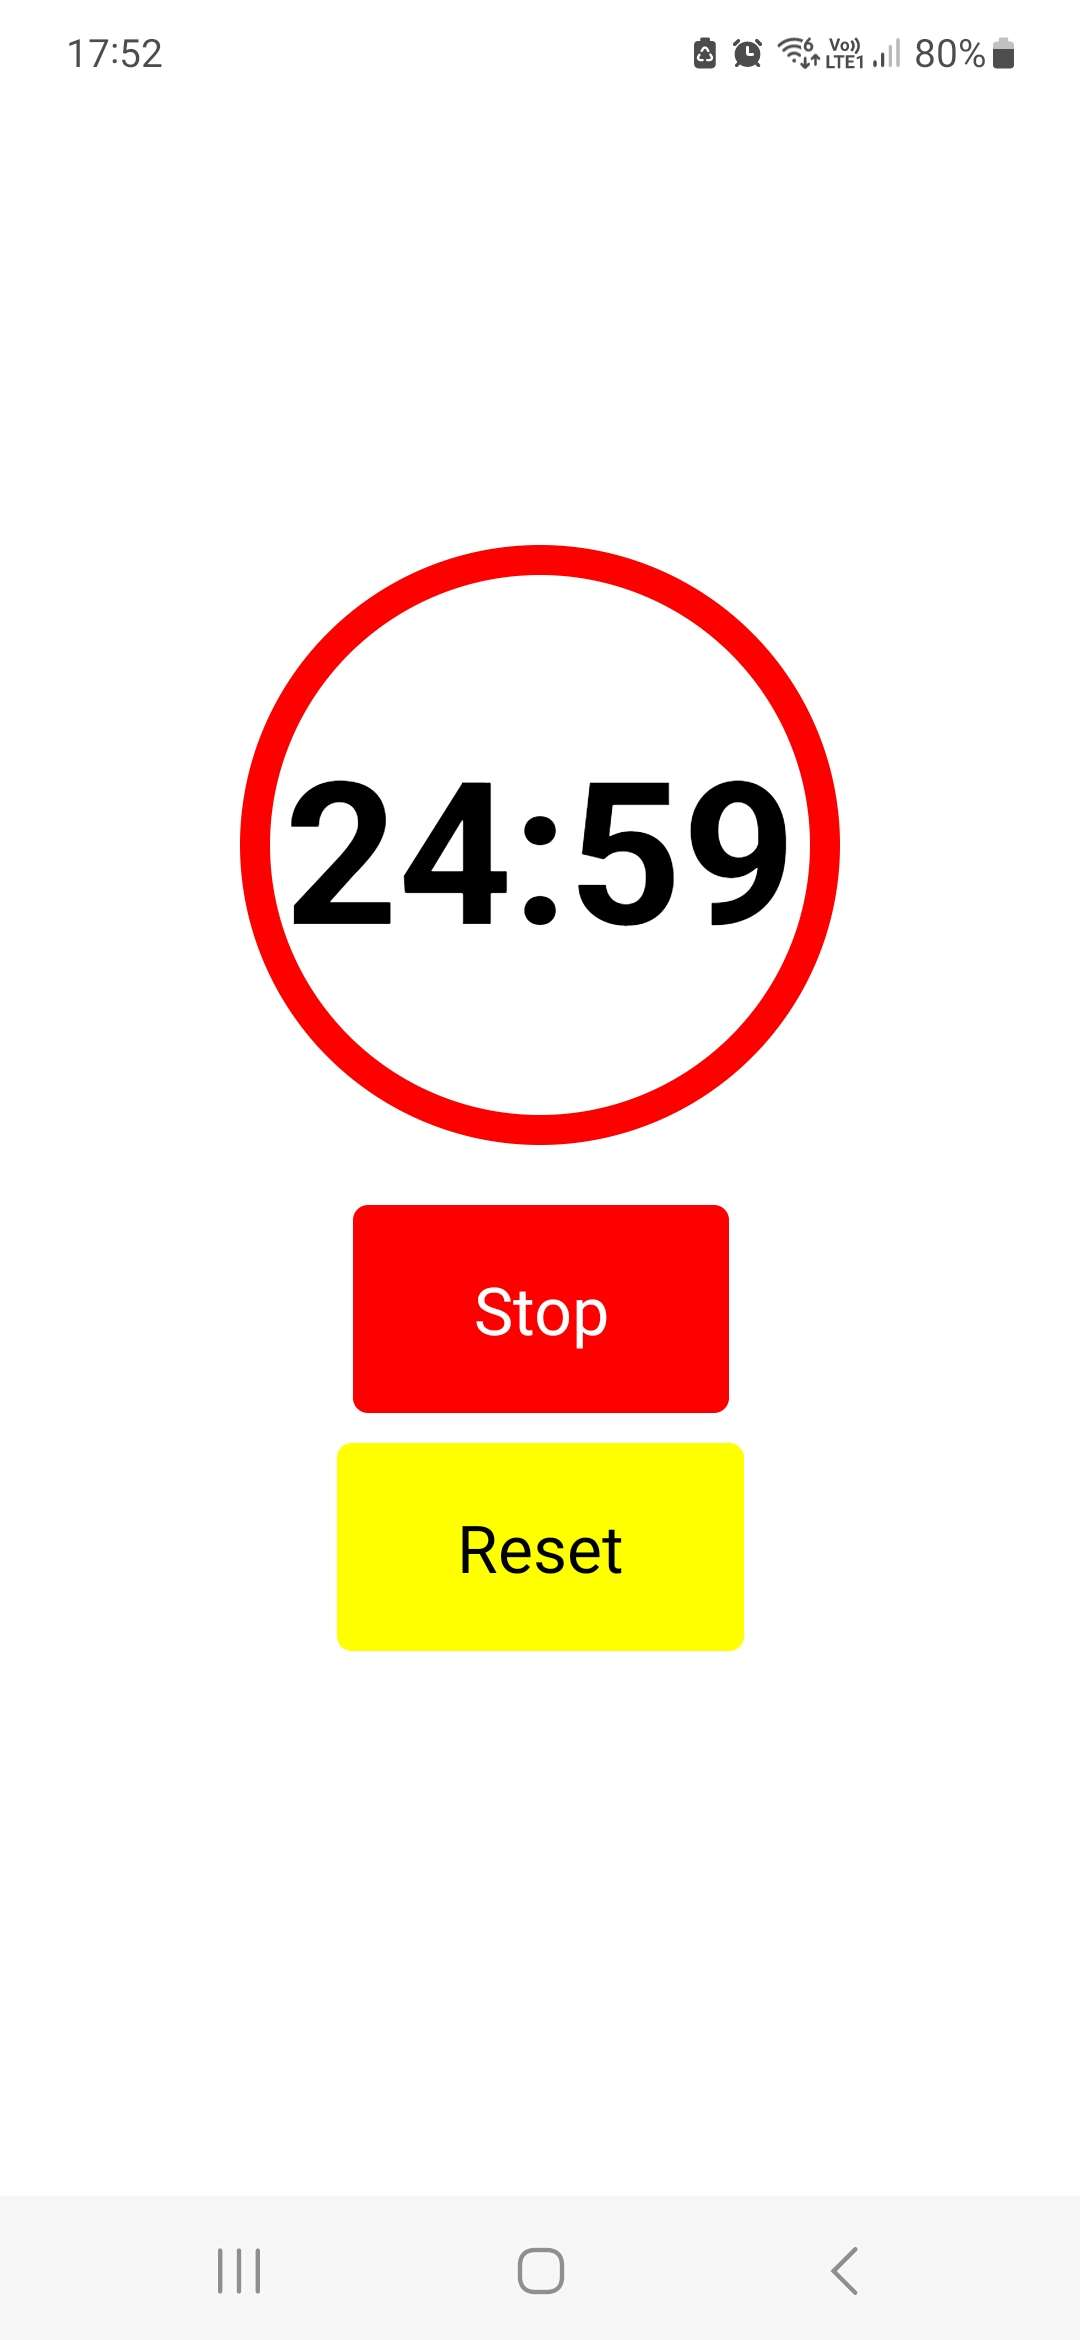
},4. แสดงผลของการทำงานไล่ตั้งแด่ Circle ครอบนาฬิกานับถอยหลังเอาไว้และปุ่ม Start : Stop ที่เป็นปุ่มเดียวกันโดยมีหลักการทำงานคือเมื่อกด start แล้วจะเริ่มนับถอยหลังและแสดงปุ่มเป็นสีเขียว ส่วนปุ่ม Stop เมื่อกดจะเป็นสีแดงและหยุดนับเวลาชั่วคราวตามด้วยปุ่ม Reset
return (
    <View style={styles.container}>
      <View style={styles.circle}>
        <Text style={styles.timerText}>{formatTime(seconds)}</Text>
      </View>
      <View style={styles.buttonContainer}>
        <TouchableOpacity
          style={[styles.startButton, isRunning ? styles.stopButtonRed : styles.startButtonGreen]}
          onPress={() => setIsRunning(!isRunning)}
        >
          <Text style={styles.startButtonText}>{isRunning ? 'Stop' : 'Start'}</Text>
        </TouchableOpacity>
        <TouchableOpacity
          style={styles.resetButton}
          onPress={() => setSeconds(25 * 60)}
          disabled={isRunning}
        >
          <Text style={styles.resetButtonText}>Reset</Text>
        </TouchableOpacity>
      </View>
    </View>
  );
};

export default Timer;
ปิดท้ายก็จะได้หน้าตาแบบนี้
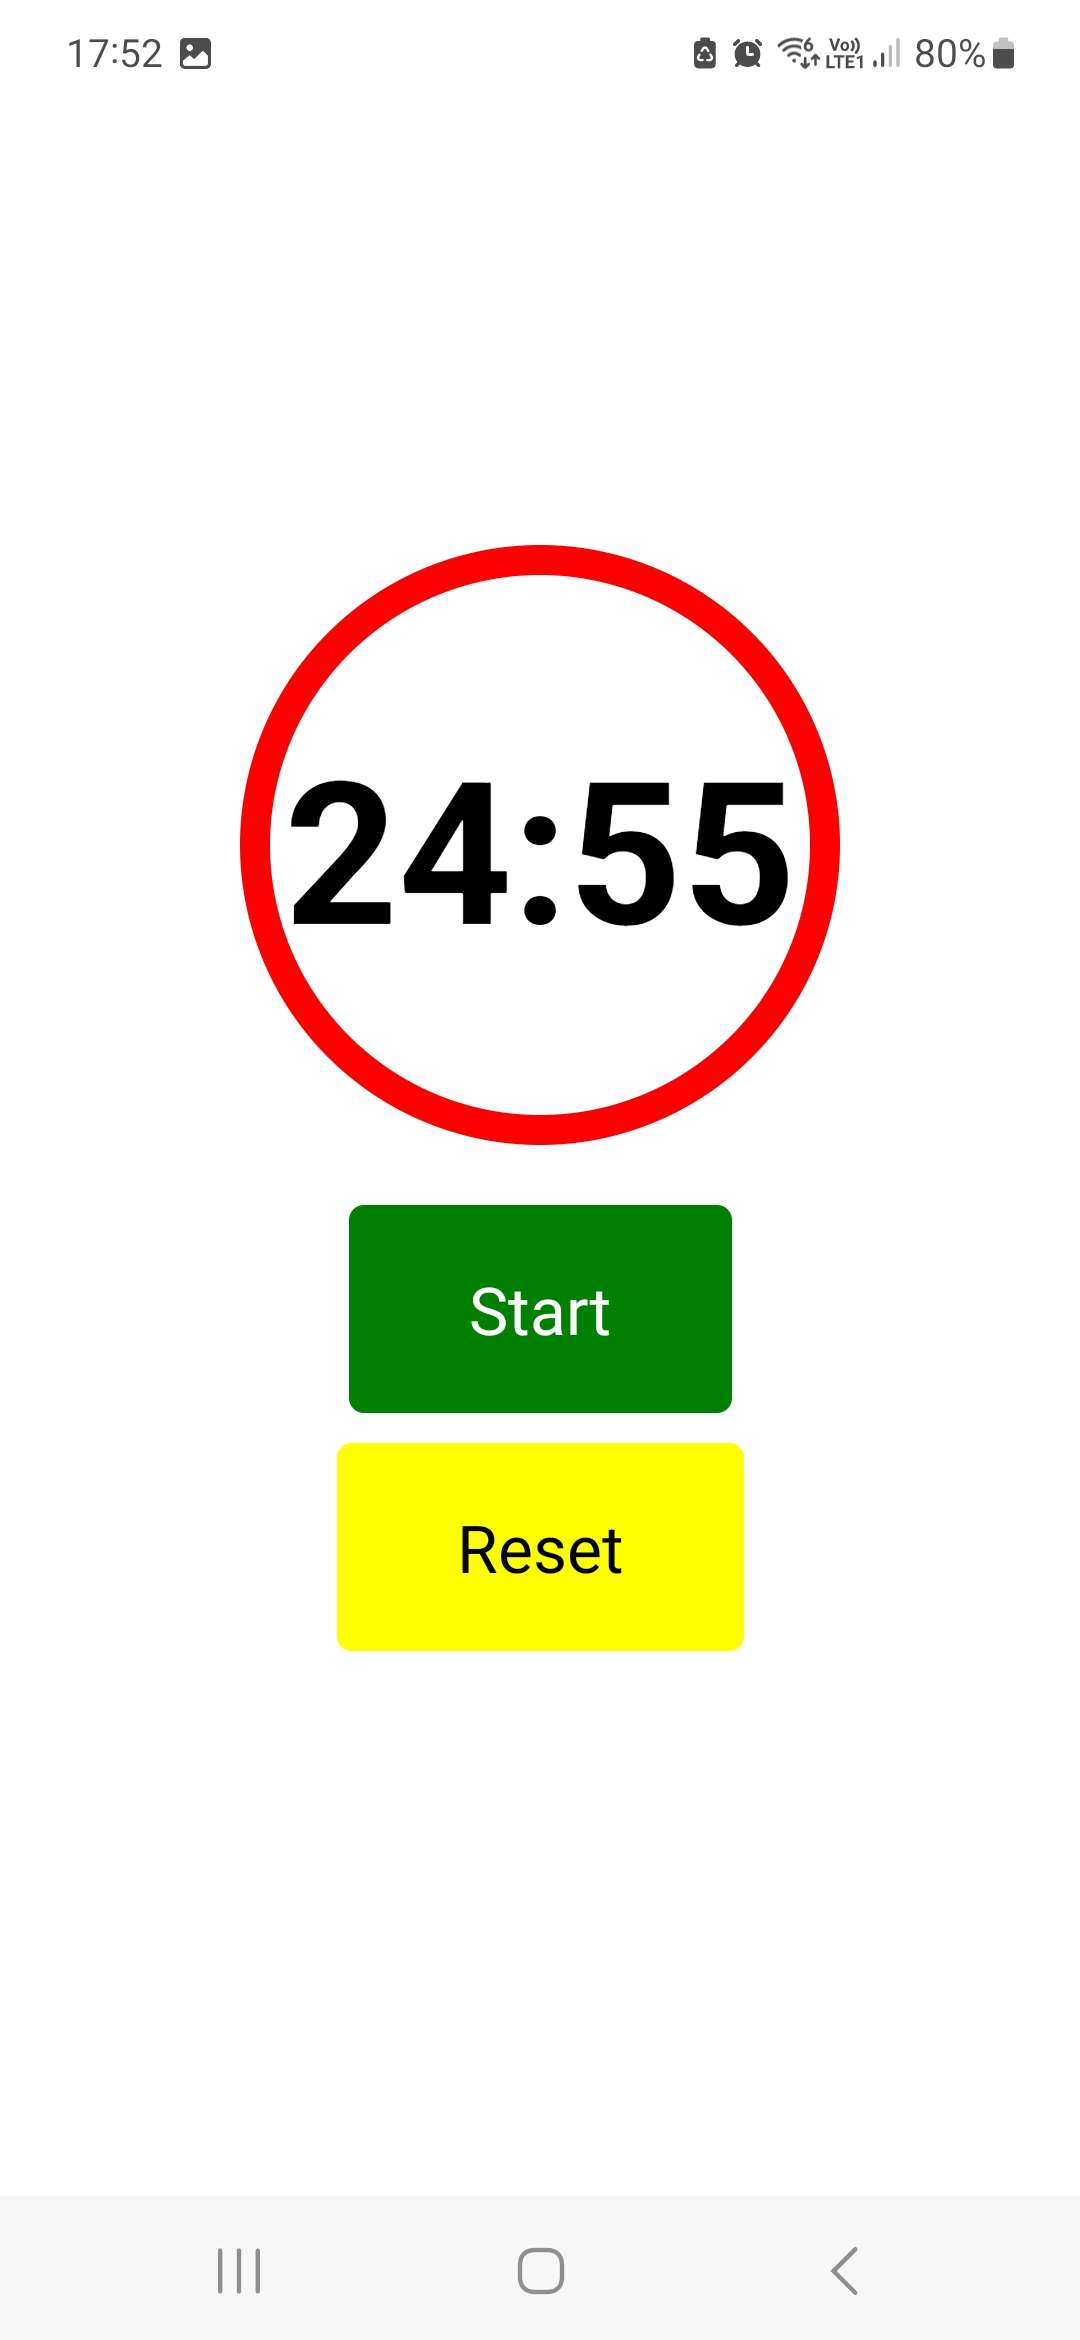
และหน้าตาของโค้ด Timer.js ทั้งหมดจะเป็นดังนี้
import React, { useState, useEffect } from 'react';
import { View, StyleSheet, Text, TouchableOpacity } from 'react-native';

const Timer = () => {
  const [isRunning, setIsRunning] = useState(false);
  const [seconds, setSeconds] = useState(25 * 60);

  useEffect(() => {
    let interval = null;

    if (isRunning) {
      interval = setInterval(() => {
        setSeconds((prevSeconds) => prevSeconds - 1);
      }, 1000);
    } else {
      clearInterval(interval);
    }

    return () => clearInterval(interval);
  }, [isRunning]);

  const formatTime = (time) => {
    const minutes = Math.floor(time / 60);
    const seconds = time % 60;

    return `${minutes}:${seconds.toString().padStart(2, '0')}`;
  };

  const styles = StyleSheet.create({
    container: {
      flex: 1,
      justifyContent: 'center',
      alignItems: 'center',
    },
    circle: {
      width: 200,
      height: 200,
      borderRadius: 100,
      borderWidth: 10,
      borderColor: 'red',
      justifyContent: 'center',
      alignItems: 'center',
      marginBottom: 20,
    },
    timerText: {
      fontSize: 60,
      fontWeight: 'bold',
      textAlign: 'center',
    },
    buttonContainer: {
      justifyContent: 'center',
      alignItems: 'center',
    },
    startButton: {
      paddingVertical: 20,
      paddingHorizontal: 40,
      borderRadius: 5,
      marginBottom: 10,
    },
    startButtonText: {
      fontSize: 20,
      textAlign: 'center',
      color: 'white',
    },
    startButtonGreen: {
      backgroundColor: 'green',
    },
    stopButtonRed: {
      backgroundColor: 'red',
    },
    resetButton: {
      backgroundColor: 'yellow',
      paddingVertical: 20,
      paddingHorizontal: 40,
      borderRadius: 5,
    },
    resetButtonText: {
      fontSize: 20,
      textAlign: 'center',
      color: 'black',
    },
  });

  return (
    <View style={styles.container}>
      <View style={styles.circle}>
        <Text style={styles.timerText}>{formatTime(seconds)}</Text>
      </View>
      <View style={styles.buttonContainer}>
        <TouchableOpacity
          style={[styles.startButton, isRunning ? styles.stopButtonRed : styles.startButtonGreen]}
          onPress={() => setIsRunning(!isRunning)}
        >
          <Text style={styles.startButtonText}>{isRunning ? 'Stop' : 'Start'}</Text>
        </TouchableOpacity>
        <TouchableOpacity
          style={styles.resetButton}
          onPress={() => setSeconds(25 * 60)}
          disabled={isRunning}
        >
          <Text style={styles.resetButtonText}>Reset</Text>
        </TouchableOpacity>
      </View>
    </View>
  );
};
  );
};

export default Timer;
เพียงเท่านี้เราก็จะได้ปุ่มกดที่สามารถกดทำงานได้แล้วนะครับ สุดท้ายนี้ถ้าเพื่อน ๆ ชื่นชอบบทความนี้และคิดว่าเป็นประโยชน์ก็อย่าลืมกด ❤ ให้กันเพื่อที่จะได้ไม่พลาดความรู้ใหม่ ๆ ที่ส่งตรงถึงที่ให้กันไปแบบฟรี ๆ ไปเลยและในตอนนี้ผมก็ต้องขอตัวลาไปก่อน…
ขอบคุณที่เข้ามาอ่านกันนะครับ🙏

แนะนำสำหรับคุณ
สงวนลิขสิทธิ์ © 2565 - ข้อมูลและเนื้อหาทั้งหมด - บริษัท บอร์นทูเดฟ จำกัด